A wig that looks obviously like a wig is almost always a styling problem, not a quality problem. I’ve seen women spend serious money on quality hair and still walk out with something that reads immediately as a wig — and I’ve seen affordable units styled so well that nobody could tell.
The difference comes down to a handful of steps that most people either rush or skip entirely. Here’s what actually matters.
1. Pluck the hairline before anything else
A factory hairline is too dense. Real hairlines have variation — some thinner sections, a few baby hairs, natural sparseness around the temples. When you put on a wig with an unplucked hairline, your brain registers it as wrong even if you can’t articulate why.
Use tweezers and work slowly. Start at the temples and the center front. Pull single hairs in the direction they grow. Take out less than you think you need to — you can always pluck more, you cannot put hair back. Ten minutes of plucking transforms how a unit sits on your face.
2. Melt the lace properly
Visible lace is the fastest way to break the illusion. The lace needs to disappear into your skin tone, not sit on top of it.
Use a lace tint spray or foundation that matches your scalp, not your face. Apply it to the lace before you put the wig on. Once it’s on, press the hairline down with a soft cloth and a low-heat setting — not your fingers, which leave uneven pressure. If you can see where the wig starts, the lace work isn’t done yet.
3. Install it on a flat, secured base
A wig moves when the base underneath it moves. If you’re installing directly on loose hair or a bumpy braid pattern, the unit will shift during the day and nothing you do at the hairline will hold.
Flatten your hair completely before installing. A wig cap that matches your skin tone adds another layer of security and helps with tint consistency at the hairline. Use got2b glued or a similar adhesive sparingly at the perimeter — you need grip, not a seal.
4. Style it after it’s on your head
Most people style the wig on a mannequin head and then put it on. The problem is that mannequin heads have different dimensions than your actual head, so the style shifts when the wig moves to its real position.
Do your basic prep off the head — detangle, apply any leave-in, rough-dry if needed. But your final styling, your part, your curls or waves, your edges — do all of that with the wig already on and secured. The hair will fall the way it’s actually going to fall.
5. Create a realistic part
The part is where most wigs get exposed. A perfect straight line down the center looks synthetic because real parts are never perfectly straight. They have slight variation, exposed scalp that looks like skin rather than weft, and some baby hairs at the edges.
Use a rat tail comb to create the part and then go back with a small brush and a scalp tint or dark eyeshadow in the part itself. This creates depth. Without it, the part looks flat and the contrast between the hair and the exposed weft reads as artificial.
6. Lay your edges intentionally
Edges are not just a style choice — they are part of what makes a wig read as your hair. When the baby hairs at your hairline transition naturally into the wig’s hairline, the eye accepts the whole thing as one unit.
Use edge control and a soft toothbrush or edge brush. Work in small sections. The edges should look like they’re growing from your scalp and connecting to the wig, not sitting separately from it. If the wig has no baby hairs around the perimeter, you can use eyebrow gel and tiny hair fibers to create the illusion of them.
7. Finish with a light-hold spray and a scarf for 10 minutes
This last step is the one most people skip because it requires waiting. Wrap the hairline with a silk or satin scarf after your edges are laid and your style is done. The compression sets everything in place — the lace, the edges, the hairline — so it all looks like it belongs together when you take the scarf off.
This also helps the wig settle into its final position and smooths any bumps or gaps at the hairline. Ten minutes. It makes the whole install look like you took an hour longer than you did.
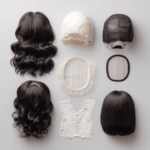
The hair matters too
All of this technique works best when the hair itself is quality. A unit with matting, excessive shedding, or inconsistent texture will fight you through every step of this process. The styling can only do so much if the foundation isn’t there.
At Gios Hair Shop, every unit is selected for texture consistency, density, and longevity — because the best install starts with hair that’s worth installing. Browse our current collection here and if you have questions about which unit fits your lifestyle and styling level, reach out directly. That’s what we’re here for.
Quick answers
How long does a good wig install take? A proper install with all these steps takes about 45 minutes to an hour the first time. Once you know the unit and have a routine, you can get it down to 20 to 25 minutes.
How do I keep the wig looking natural throughout the day? The hairline is what shifts first. A light touch of edge control mid-day and pressing the hairline back down with your fingers keeps everything in place. Avoid touching the lace area repeatedly — the oils from your hands break down the adhesive.
Can I make a synthetic wig look natural? Some of these steps apply — plucking, edge work, scarf setting — but synthetic wigs have texture limitations that quality human hair doesn’t. For the most natural result, human hair units give you significantly more flexibility in styling and finishing.
What’s the most important step for beginners? The hairline pluck. It’s the first thing the eye goes to and the step with the highest impact per minute of effort. Start there before anything else.